About This Blog

Xenophon's Ghost covers military history and wargaming from the ancient period to modern times.
Showing posts with label Spartans. Show all posts

Friday, December 14, 2012

Sparta & Kappadokia

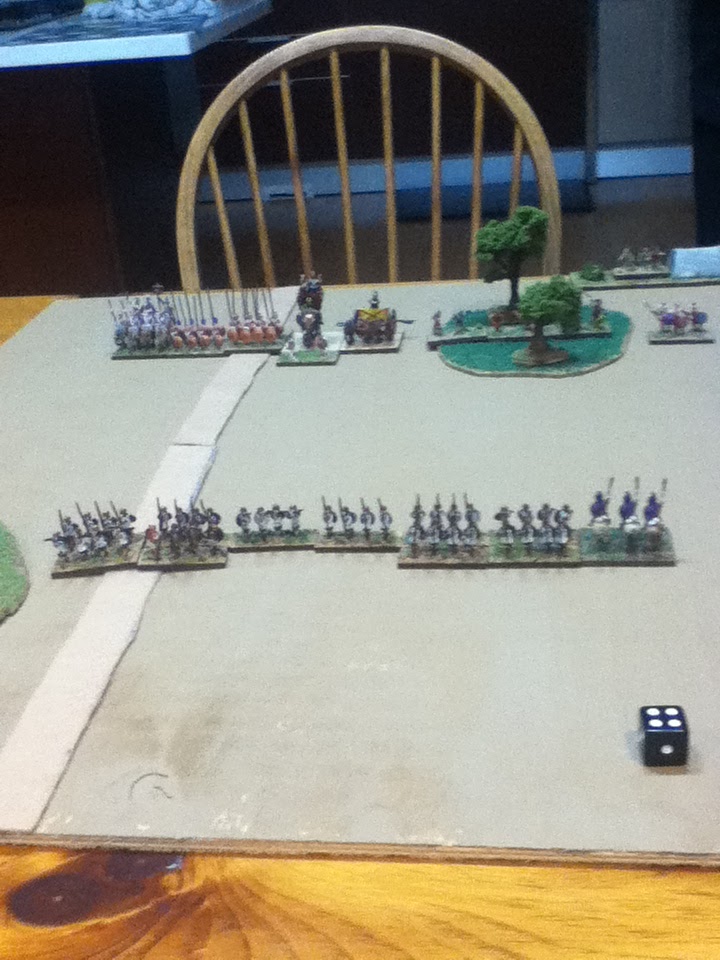
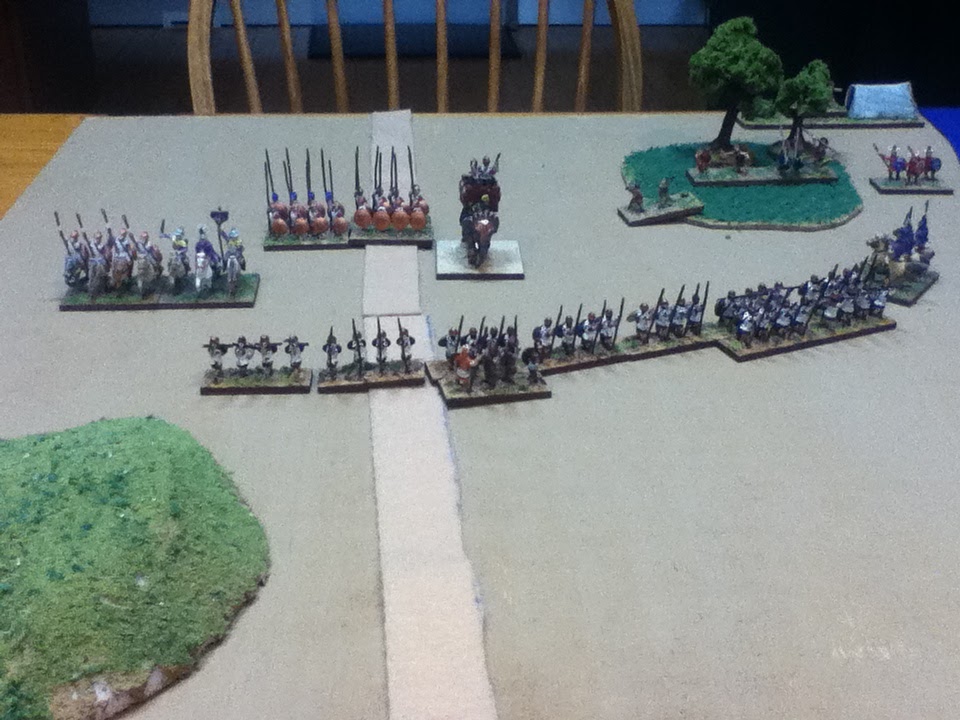
Carrying on with the play-by-play for our Seoul-Micro-Con, lets look at Ian's Kappadokian fight against Ryan's Spartans.  Ryan deployed his Spears in a long line on the right, supported by a smaller group on the left with the Cavalry element.

Spartans Advance
  Ian formed a cavalry element on his right, placing most Auxilia on his right, facing the main Spartan line.  Early in the game, he advanced his main foot body into bad going.  He pushed one Psiloi out front.


Auxilia seize the rough going
Spartan hoplites killed the lone Psiloi, as Ian shifted the cavalry to the center.  This move took the slower flank hoplite formation out of play.  In the middle of the game, Ian's command luck failed him; he rolled many 1 PIPs.  However, he opened up the field in a cavalry stand-off that the Spartans lost.


As the fight developed, the Spartans were confronted on two sides, with little maneuver room.  Ryan stood his ground despite a series of flanking moves that took out two Spears.  In response, he managed to kill one Light Horse and an Auxilia.


Heat of Battle

 Eventually the Kappadokian's mobility paid off, as a cavalry flanking move killed a final Spear element.
End Game
The final loss count was Kappadokians - 3 and Spartans -4, another win for Ian.  He complemented Ryan's grasp of the rules.

Monday, December 10, 2012

Seoul Mini-Tourney

Jeff organized a mini DBA 2.2 tourney in Seoul yesterday.  The players and armies were:
  • Jeff  - Arab Conquest
  • Ian - Kappadokians
  • Ryan - Late Spartans, Phokians
  • me - Seleucids (c list)
In about three hours, we played eight games total.  I will share photos of the games in the next few posts.  I tried to take photos and play at the same time, so the coverage will be inconsistent.  I also took more shots at the beginning of the session than the end.

It was a great time.  Having had little playing experience with others, Ryan and I both left motivated.  My son is thinking about procuring his own army....leaning towards a Blade-heavy list.  Jeff and Ian are both good sports.  Ian has a lot of DBM experience, so it was interesting to learn about the differences in the rules.

The Winner Is....

Jeff and his Arab Conquest army were unbeatable.  Ian gave him a good run with the Kappadokians in the final game, and the second Arab-Seulicid match could have gone either way, but Jeff was undefeated.

I need a lot of practice with the Hellenistic armies and in using terrain more effectively.  I failed to create a plan that would maximize the strengths of the Seleucid list.  The Arabs and Kappadokians were particularly difficult for me.  The strengths of the Seleucids, namely the Pikes and Elephant, were not very effective against these lighter and faster foes.  Twice I made the error, once fatally, of trying to send a cavalry unit through a narrow gap between a hill and board edge.  Despite those challenges, I had fun playing a new army and enjoying the fruits of my painting effort.  Although it scored no kills for me, the Scythed Chariot was fun to try out.

Game 1 - Arab Conquest vs. Late Spartans

My son Ryan and I are still newbies.  We both understand the rules in general, but there is a a lot of nuance in DBA.  As Jeff noted, Ryan played a tough army for a beginner - Late Spartans.  It consists of nine spear, one cavalry, and one psiloi.  The Arabs were a combined arms group of mounted, warband, and bow.  Warband QK Spear, so Ryan was in for a tough fight.  

Arab Conquest vs. Spartans
As the defender, he laid down a river across the center of the board.  The river ended up as a paltry crossing, and the battle turned into a slugfest along the banks.  If it had been impassable, the game might have been much slower...


The Arab Light Horse made it across and helped in a flanking move.  The game ended quickly with a 0 Arab - 4  Spartan loss result.


Game 2 - Arab Conquest vs Spartan Redux


Absorbed in my own troubles, I didn't snap a photo of Game 2 until the Arabs had seized the high ground and sent Light Horse on to a flank.  Jeff is not a timid player...The Spartan Cavalry is out there by itself on the far right.  Ryan had attempted to run around the bad going to chase the bow, but Jeff moved the bow into the rough.


Ryan ended up fighting in multiple directions with the Light Horse pestering him in the rear.  After losing two Spear, he managed to flank and kill one Warband.


The Light Horse was headed to the camp after disrupting his line.  In the end, the Arab Warbands Quick Killed a total of four Spear.  Result: 1 Arab to 4 Spartan losses

In the next post, I'll share the results of a much slower game: Kappadokians vs. Seleucids.  I lacked a good plan of action, scattering my force.  The dice gods didn't favor Ian for the first half of the game.

Saturday, December 8, 2012

Practice Run

Deployment
Jeff organized a DBA 2.2 mini-tourney for this weekend.  We will have five players present.  Ryan and I decided to try out my nearly finished Seulicids against his late Spartans (II/5a).  The terrain included a waterway, road, hill, and woods.  The Spartans attacked.  Ryan rolled five PIPs and launched his Psiloi across the board, attempting to QK the Elephant.  He failed and recoiled.


Psiloi Gambit


Flanked Psiloi


In the next turn,  I  advanced the Elephant and flanked him with a Psiloi that was deployed in the woods, destroying the attacker.


Scythed Chariot Attacks Spartan Line and is Destroyed

I launched the Scythed Chariot right away at the middle of the Spartan Hoplite line.  It didn't go so well. Thank goodness lost SCh's don't count against you.


Ryan used his Hoplite Spears as a pinning force essentially, hoping to withstand my attacks until he could take out the Auxilia and Psiloi.  He wheeled the line and anchored it on a hill to reduce the maneuverability of the Knights.  I managed to quick kill one Spear element with my Knights, but a series of Knight attacks later in the game failed.

Forces approach
Recoil Risk
Ryan noticed that my Elephant and Pike line were near each other, so he used his Elephant to flank, forcing the beast to face about and hoping it would recoil into the Pikes.  My luck on the dice was unbelievable.  Because the Spartan line boxed in my Pikes, I risked an Elephant stomping in multiple turns at several points in the game, but the dice rolled in my favor.  For several turns, the Cavalry attacked and recoiled.


Boxed In
Ryan wheeled his main line back and anchored it on the flank, splitting off Spears to go after the lighter troops in the bad going.   He then adopted an annoying tactic of moving backwards just enough to keep my Pikes from being able to make contact each turn.  At the same time, he was careful not to give me much maneuver room.  The forces were boxed in, and I spent a lot of PIPs trying to get the line in order.


Warband before destruction
Meanwhile. Ryan managed to flank and destroy a Warband element, but his efforts to destroy Psiloi in the bad going never worked out.  He kept recoiling.  I finally managed to flank his cavalry and destroy it with the Elephant.

 
 The game ended in the bad going. My Pikes never engaged, but the Auxilia managed to kill a Spear element.  We both agreed that this was one of the funnest and most challenging games we have played thus far.  Ryan knows that it will be hard to win with the Spartans, but he likes the Spear heavy army.

Final Losses: Seleucids: 1-Sch, 1-Wb  Spartans: 2-Sp, 1-Ps, 1-Cv


Tuesday, February 7, 2012

Expedition to New Lands

Ryan and I had the pleasure of testing out the latest version of DBA, posted on 2 February, with two veteran gamers - Doug and Peter.  Doug hosted us.  His understanding of the rules and playing experience were a big help, clarifying several unclear game mechanics.  Peter also offered a number of recommendations on play tactics that improved our understanding of battle management. We also had the chance to drool over his 30 year plus investment in miniatures - quite a collection of Armies!

Spartans vs. Early Imperial Romans

Ryan played Doug in a Spears vs Blades slug fest.  It was a close game, but the Spartans prevailed thanks to luck on the die and the resilience of Spears against Auxilia.

The Spartans defended, using hills to protect the flanks and the camp.  The deployment resulted in a bunched up force.  However, the units in the rear were ready to counter flanking attacks.

The Romans deployed a combined arms force, placing Auxilia and Light Horse on the wings.  Cavalry deployed in the center with the Legionnaires.  A horse-drawn ballista was also fielded; our first encounter as DBA newbies with any shooting force.


Ryan advanced his Spartans forward of the hills in order to deploy in line.  This placed two spear elements in artillery range, but Spartan dice luck prevailed.  Only one or two artillery shots find its mark throughout the game.


Most of the action centered on the flanks.  Doug moved two Auxilia on the Spartan right flank toward the camp.  Auxilia and Light Horse also threatened the Spartan left flank.


Fortunately, a number of high PIP rolls allows Ryan to maneuver his reserve to confront the detachments.


The Spartans managed to chase off the Light Horse and destroy one Auxilia element on the left.  On the right, the outcome was long in question.  One Roman Auxilia attacked the camp, destroying the camp followers.  Another Auxilia faced Spartan elements trying to move uphill.

A key rules question emerged at this point - does the Auxilia automatically advance into a camp once the camp followers are destroyed?  We interpreted the following rule...

".... or a camp whose defenders have been destroyed, can be occupied without combat by moving a troop element into it."

...to mean that the Romans would need to expend another PIP to move the Auxilia into the camp.  This delay gave the Spartans time to confront the Auxilia element. After several bounds, the Auxilia was pushed off the board in a recoil.

The Spartan Spears trying to attack uphill were eventually destroyed by Auxilia, right before the Blades and Spear lines clashed.  After a few bounds of to-and-fro recoiling, the Spears finally destroyed two more Roman elements, including at least one Blade, to win the game, 4-to-3.


Feudal Fuss - French vs. 100 Year War English

I played a second game against Doug, that ended quickly. We fought two 15mm armies featuring bows and Knights.  Doug played the English, dismounting some knights, including the General, at the beginning of the game.

My French were defending, and I deployed three Knights on the Right Wing with a Cavalry element on the Far Right.  My Blades and Bowmen were deployed in a line, with a number of elements in Woods.

I quickly learned why a conservative deployment and patience is needed as a defender.  English bow faced off my Knights and Cavalry.  English Knights formed a reserve.  I rolled three PIPs for the first bound, limiting my options to deploy my blades and bows, stuck in the Woods, without losing the form of the line.  We had a friendly chat on my options.  With mounted forces, I had the opportunity to charge in, limiting the shots taken by Bow.  Unlike the Spartan defensive line in the first night, I didn't need to be a static target for long range artillery shots.  I opted to be aggressive, moving the mounted forces forward.  Doug adjusted his force deployment to prepare for battle and ensure the Cavalry did not turn his flank.

In my second bound, the Knights and Cavalry charged the Bow line, with the three Knights aligned with the Bow.  The Cavalry element provided an overlap.  The die didn't favor me, and my one successful combat resulted in my rash General pursuing the destroyed Bow, resulting in overlap and isolation.

In Doug's second bound, it was all over.  He flanked my General Knight, destroying it and two other mounted troops with his Bow, winning 4-to-1.
Post Mortem - Fuedal French Gen Kn, Kn, and Cav destroyed.
After Action  Review

I was happy to see that Ryan and I have a general grasp on the rules. After the game, I spent time comparing the last two beta versions of DBA 3.0 and the playing results.  Questions from the playtest:
  • We may not have played the distant shooting combat correctly.  I don't recall that the English bow fired at the French Knights during the French turn.  If so, this was an omission on our part, not a problem with the rules.
  • We were unsure of the camp occupation rule when camp followers were destroyed, as described above.
  • Doug explained the meaning of the second sentence in the Moving into Contact With Enemy section (pg 9) to us, which reads, "Only a group can move into edge contact with a single element's or group's corner." Without his explanation, I was at a loss as to the necessity of this rule.  Why couldn't a single element contact a corner, I wondered.  Recommend review of this section for improved clarity.
  • In my post-game review, I have noticed several other points in the latest version that could benefit from re-ordering. Rules that have dependencies are explained in different sections.  I won't belabor these points in the blog, but I may recommend changes in the Yahoo Group discussion.
I recommend the following rules changes:
  • Allow positioning of terrain up to the battlefield edge.  As noted in previous playtests, the rule requiring terrain placement at least 1 BW from the edge further constricts the deployment area.  This affected both of our games.  I think the deployment restriction that encourages use of the flanks for light force deployments is helpful and historically accurate.  The requirement to leave a 1BW open area along the edge is not.  Any commander worth their salt would seek out terrain that made encirclement more difficult and allowed easy movement in the center of the battlefield.
  • As a new player, I found it odd that groups can move to form a column using a single PIP but not move from a column to a line with a single PIP.  I thought I had missed a rule somewhere. Doug and Peter confirmed that moving from column to another formation requires multiple PIPs.  I recommend a formation change rule be added to address this oddity unless the rationale relates to the difficulty of commanding and controlling troops in this era. I haven't read any cases where armies were slow to deploy into line in Greek or Macedonian battles at least.
  • Reintroduce Psiloi rear support, but limit the support to the element directly in front of the Psiloi.  I certainly would have deployed my Feudal French Psiloi as support if this had been an option.  I question the idea that slingers or bowmen could support a line three elements wide in one bound, but, if I were a Psiloi behind infantry in melee with the opponent, I would be lobbing stones or arrows into the bad guys.
I must thank Doug and Peter.  It was great to meet fellow wargamers for the first time.  They were gracious and patient hosts.

Cheers,
Dave


Thursday, December 29, 2011

The Spartan's Prevail - DBA 3.0 Playtest

Today, we tried out DBA 3.0, pitting the early Spartans (1/52b) against Galatians (II/30b). Ryan played the Spartans, choosing 12 Spear elements. 
 
Once again, the dice roll placed me in the position of the defender with the Galatians.  I chose a road, two small woods, and one gentle hill as the terrain pieces.  Based on our last game, I went with smaller terrain pieces in case the dice required placement of multiple pieces in the same quadrant.  I also benefited from a comment, learning that a roll of six results in the attacker choosing only the quadrant for placement, not in the attacker placing the terrain. I had missed the distinction in the rules.
 
For the Galatians, I fielded 1x General in Chariot (LCh), 2 x Cavalry, 8 x Warband, and 1 Psiloi.  I initially tried to field the mounted forces on the right flank, in front of a small wood.  However, the measuring stick proved that this wouldn't be possible, it placed my forces to close to the center of the board.  So, I settled for placing the force in reserve.  My Warbands and Psiloi formed a large group, deployed in the center of the board.

Ryan deployed his Spartans in three groups, with one dispatched to his left flank in column, near a forest.

The dice didn't favor me again today.  I rolled very few PIPs in the first turns, resulting in my Psiloi being isolated.  Trying a new tactic, I moved them twice in the first turn, finishing the move in the wood between two Spartan groups.  I intended to advance the Warband group forward in order to engage the Spartan force on my left. I also started moving my mounted group to the right flank. 

Before my plan developed, Ryan advanced and flanked the Psiloi. After a few successful melee rounds, with the terrain advantage saving its skin, the Psiloi was destroyed.

When playing DBA 2.2, I had used a rule and tape measure, since movement distances were in inches.  I created a measuring stick, seen on the table, for DBA 3.0.

As the battle progressed, we ended up with two engagements.  One fight occurred between a Spartan group, four Galatian warbands and the Galatian mounted forces.  The other fight involved six Spartan spear elements in two groups and four Warbands.  After six rounds of melee between these groups, with numerous recoils and pursuits, Ryan won the game 4 -3.

Intrepretations

We had to carefully review the rules on several points.

Pursuit - We were unsure if supporting Warband elements pursue along with the unit in combat.  I interpreted the following statement on page 12 as meaning "yes." 

"An element of any of ........Warbands (or that could provide rear support to any element of these even if not providing such support against current opponents) that is fighting foot,..."

Effect of destroyed unit on rear support- If a Warband element that is being supported is destroyed, what happens to the Warband element providing rear support?   If both elements have been flanked when the element in combat is destroyed, is the rear support unit also destroyed? 

Since the paragraph on destroyed elements doesn't address the effect on a rear support unit, we didn't destroy rear support units.

A Puzzler

During the last turn, Ryan flanked a Warband element that had rear support.  While another Spartan element is engaged with a neighboring unit, the Warband element had no enemy to its front.  I rotated both the flanked element and its rear support element to face the Spartan.  I remain unsure if we maneuvered the forces correctly.   The game ended before this melee occurred.   Thoughts?

I have made numerous notes on the 3.0 rules.  We are playing one more game - Kappadokians versus Galatians - before I submit my comments to the Yahoo DBA Group. 

I'm busy painting elements for a Hellenistic Army Morph plan using the 3.0 draft Army lists. When those units are ready, we will take another run at the rules with some Pikes in the action. 

Tuesday, December 27, 2011

Getting Started in DBA

I took up De Bellis Antiquitatis (DBA) in May of this year.  After two years of painting American War of Independence and Napoleonic miniatures, but rarely having the time, or opponents, for long games, I stumbled upon www.fanaticus.org, a fan site dedicated to the game.  DBA was appealing due to the short play time and small army size.  I was also attracted to the abstract nature of the rules which capture the essence of Ancients battles while using a small number of miniatures.  My son Ryan, age 11, is my principal opponent in gaming, and he found the game appealing, too. I started with paper miniatures as a test before committing  to buying and painting figures.  We tested out DBA playing a Macedonian Imperial army, Marian Romans, and Late Spartans.  I first taught myself the rules while on a business trip, and we then had a go at several games with the paper figures.

My timing was not great.  I couldn't find any copies of DBA 2.2 for sale. When I joined the yahoo group for DBA (DBA@yahoogroups.com), I found that the authors, Phil and Sue Barker, had posted the 2.2 version of the rules on the group site during the interlude between publication of 2.2 and the latest version 3.0.  Sue also posted draft army lists for 3.0, allowing me to get into the game.

When it came time to buy some Armies, I went with my heart and available internet bargains, picking up Essex 15mm early Spartan (I/52b), Galatian (II/30b), and Ariarathid Kappadokian (II/14) armies, from Wargames LLC (www.wargamesminis.com.) The service was great.  In fact, my Spartan DBA army pack was one command figure short, and Baxter at Wargames LLC threw in another figure for me when I ordered some more miniatures a month later. 

I chose the Galatians and Kappadokians based on two factors: the types of units in each army and the fact that the armies were listed as enemies.  The Galatians are primarily a Warband army.  The Kappadokians represent a light, combined arms force with an emphasis on Auxilia. 

http://en.wikipedia.org/wiki/File:Helmed_Hoplite_Sparta.JPG
On the other hand, the choice of Early Spartan is not an obvious fit with the other two armies.  However, can any reader of Herodotus and Xenophon not want a Spartan army for DBA?  While the monothematic force proved easy to paint, I have found it difficult to win with the Spartans against their anachronistic foes.

Phil and Sue Barker have made progress on the new version of DBA, version 3.0, with the help of numerous playtesters.  The rules are now posted in the yahoo group, and DBA players have been asked to test them out.  Based on the detailed and passionate feedback on the yahoo group site, active testers appears to have much experience playing the game, and very strong opinions as to the pros and cons of the game versions.  I've decided to do my part, playtesting the rules as a bonafide newby with Ryan.
I just finished painting my third army, the Kappadokians, but the bases are not completed yet.  However, we tried out the new rules first with the Kappadokians fighting the Spartans.